Chatter marks on Yankee Surface
Formation of chatter marks on Yankee surface – causes, prevention and countermeasures

General considerations:
Chatter marks is damage to the yankee surface caused by the vibration of doctor blades! That is the general consensus. But – are chattermarks really caused only by doctor blades?
Actually, only indirectly. The real culprits are the reasons for which the doctor blades come to vibrate.
So – what to do?
The actual root causes for the vibrations at the doctor blades (tips) and the subsequent formation of chatter on Yankee surface have to be analyzed.
Are the root causes determined through appropriate analysis and measurements then
the damage on the Yankee Dryer has to be repaired and the early re-formation of the chatter marks has to be prevented.
Initial situation / problem description:
Machine:
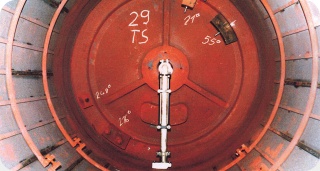
Tissuemachine, Yankee 18´x 6035 mm, startup in 2007, design speed 1.800 m/min, paperweight 17 – 23 g/qm

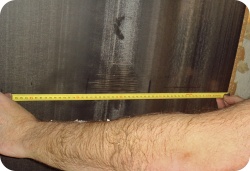
Shortly after start-up in 2007, the Yankee Dryer showed a strong tendency to suffer from chatter marks and chop – particularly towards the Yankee edge areas.
Already in 2008 the intervals for grinding to re-establish a good surface was reduced to 2 – 3 months! That resulted in a limitation of machine availability and productivity, falling considerably short of the objectives and targets for this almost new machine.
This low productivity and extended downtimes due to short service intervals – as well as the costs associated with the maintenance – significantly reduced overall efficiency of the machine.


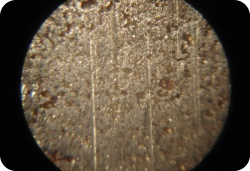
The damage pattern: mechanical and chemical damage especially in the edge areas of yankee. This process, after initiation develops progressivelyand can only be stopped by a polish grinding of surface in time. ►►
The pre-history:
The OEM machine engineers intensively did study the chatter issues. For example the yankee crown was checked and optimized, with the help of
- infrared-studies of paper at the pope reel
- temperature differences were documented
- and also the condensate removal system was tested for proper functioning.
OEM engineers unfortunately did not find any major issues that could be the root cause for chatter marks formation on this tissue machine.
The solution –
step 1: analysis/audit
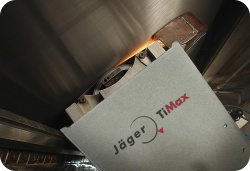
 As third party consultants, engineers of Jaeger GmbH & msquared GmbH
were contracted in 2010 to study the complete production process.
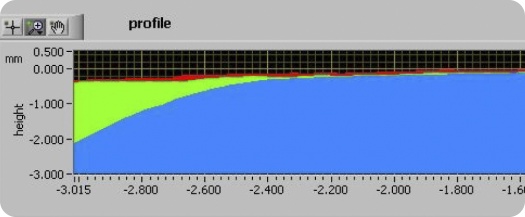
In the last renovation of the Yankee before the audit , the cylinder contour was measured by Jaeger GmbH and set in relation to the nominal values of the manufacturer the cylinder crown.
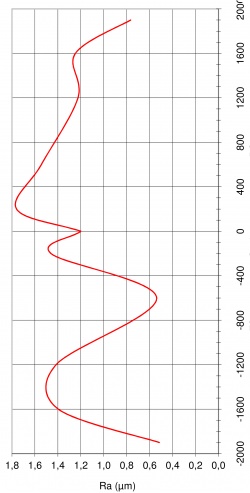
In addition, of course, the roughness of the surface, and especially the roughness differences were measured and documented.
These measurement results are the starting point and provide information about speed and course of the problem development when compared with the results of the audit measurements.
Nov. 2010: detailed OTR-TNG measurements on the Yankee (by msquared)
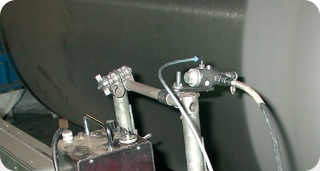
m-squared GmbH utilizes a unique measurement system OTR-TNG that profiles the cylinder during production whilst eliminating disturbing influences caused by machine vibrations and carrier cable harmonics. This is realized by a double integration of a simultaneous measured vibration signal and subtracting the harmonic movement of the sensor from the measured eddy-current cylinder profile signal.
- Measurements were made on yankee dryer´s shape under „condensing load“ and „grind“ conditions.
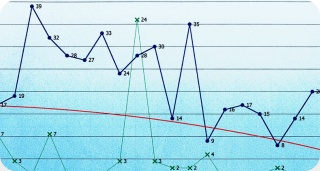
- Detailed temperature studies were conducted with a finer resolution of 10 mm CD – also under variing working conditions of the machine.
- Temperature variations were measured with hood dampers in compensating mode and also with all open at 80 %.
- Based on these measurements yankee deformation and crown has been analyzed.
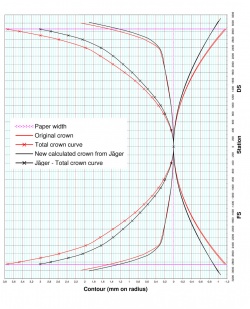
Yankee seemed to be strongly over-crowned, so in the end the recommandation was, to recalculate the crown, grind the cylinder to proper shape and stabilize the result by metalizing the surface for an increased resistance against mechanical wear and corosion.

Interpretation of measurement results –
chain of root causes for formation of chatter marks:
- The mismatch in crowning results in non-uniform pressing especially on the edges and variations in the sheet moisture profile → edges are wet and Yankee higher thermally loaded.
- The increased moisture and subsequent cooler Yankee surface results in a higher mechanical and chemical load on the surface → variations in surface roughness and surface corrosion.
- The Yankee surface characteristics varies → Doctor tip stick/slip variations → Doctor blade vibration → initiation and formation of chatter marks.
Recommendations for countermeasures:
- Recalculation of cylinder crowning – based on the measurement results.
- Contour grinding of Yankee Dryer to the new crown.
- Thermal spraying of a hard metal YC35 full-face coating onto yankee´s surface, to achieve better resistance against mechanical and chemical wear. Stable and uniform surface structure.
- Use of ceramic doctor blades for optimal performance on metalized surface.
- Optimization and new adjustment of organic coatings to match the new operating conditions. ►►
step 2: troubleshooting


Feb. 2011: recalculation of Yankee and pressroller crown
March 2011:
contour grinding to correct the crown
A profile grind using a tangential grinder was used to install the newly calculated crown which is a theoretical calculated crown (FEA methods) but also based on „real“ world measurements and observations.
Cross Machine Direction (CD) and Machine Direction (MD) measurements during the grind process assured that the target crown values are achieved within technical tolerances.
March 2011: metalization by thermal spraying full-face coating
After having achieved the ideal cylinder crowning by contour grinding, a full-face coating (YC 35) of hard metal was thermally sprayed onto cylinder´s surface – to the most uniform coating thickness possible.
This way an increased resistance against mechanical wear and corosion for the future was achieved and, of course, an increased grinding intervall as well.
step 3: wear protection
To further optimize the performance of the Yankee in the Tissue Production process, the customer agreed to also implement:
- Use of ceramic tipped doctor blades for creping and cleaning.
By using ceramic doctor materials, the roughness value of the Yankee surface coating can be kept to a more consistent and stable value.
- The tribological pairing of ceramic tip blades / metalized Yankee surface is very stable, this is especially important and critical on high speed machines.
- The organic coating was optimized for the changed operating conditions.
End result of the completed optimization program
The Yankee is since two years in operation without any regrinding and with a stable and uniform surface. Moisture profile was greatly improved immediately affecting machine performance and speed.
Remember: Grind intervals prior to optimization program 3 months!
- Machine output increased from 180 tpd to more than 200 tpd or a Δ of 20 tpd.
- Just by taking an arbitrary market value of € 500 / ton, this resulted in an additional production turnover value of about 3.4 M €/Year.
- The cost associated with the optimization program is a probably not too bad of an investment …
 As third party consultants, engineers of Jaeger GmbH & msquared GmbH
